Showing posts with label delicious dish. Show all posts

Friday, 4 October 2013

Gluten Free Soups


Honey, I'm home! rang the familiar phrase as the man entered the home after a hard day at work. The father and husband would be greeted by a loving wife who had slaved over a hot stove to make a pleasant meal after his exhausting day. He would sit down at the table and indulge in the home cooked feast. Does this really have to be a fantasy or an image of the past? Or, can there still be a permeating smell that envelops the house and excites all who enter in the present? Yes this can be a reality. After the savory scent is detected, the mouth waters as the salivary glands are activated. Then, the stomach grumbles in anticipation of the upcoming dinner. No matter what gluten-free soup recipes are on the menu; whether it is Chicken Noodle, Hamburger, or Potato, it is sure to please the palate.


The best way to make a fabulous gluten-free Chicken Noodle Soup is to add homemade broth. Homemade chicken broth has a soft enticing taste that is free of added flavor enhancers. It is so pleasant that it brings on nostalgia from the days when grandma always slaved away at the stove for hours making her own broth. All that is needed is two cups of broth, along with one cup of water. Just dice one long carrot and one celery rib and add it to the mixed liquids. Next, add 1 cup of shredded chicken, 3/4 teaspoon of thyme, 1/4 teaspoon of black pepper, 1/2 teaspoon of sea salt, and some gluten-free noodles. It is as simple as it sounds and those who consume this savory meal will suppose that it took hours to create. Let them assume that, and in the meantime enjoy this delightful recipe.

For a more labor intensive (yet worth all of the effort) recipe, attempt the gluten-free Hamburger Soup. While chopping all of the luscious vegetables that grace this filling meal, turn on some music to take pleasure in during this process. Chop one cup of carrots, celery, green cabbage, and potatoes. Add these vegetables to one pound of cooked ground beef and 1/2 cup of cooked brown rice. In order to obtain liquid, use one quart of home canned tomatoes and water. Then to enhance the flavor, add thyme, basil, sea salt and black pepper. After listening and dancing away to music during the preparation of this soup, take a hot bath while it simmers. After an hour of relaxation, dinner will be ready and the fragrance of the ground beef, vegetables, and spices will entice everyone to the table to begin the feast.

Another great tasting recipe is gluten-free Potato Soup. The wonderful feature of this recipe is that it can be made dairy-free and vegan as well. I make it gluten-free and dairy-free to meet the special needs of my family, but regular milk can easily be substituted. Simply pour four cups of coconut milk into a large pan. Then, chop three red potatoes, two long carrots, and two celery ribs. Combine these vegetables with the milk and add paprika, sea salt, and pepper. Once the vegetables have simmered for 45 minutes, add four tablespoons cornstarch to a half cup of water and mix well. Add the mixture to the completed meal and thicken. The blend of spices combined with the coconut milk gives this soup a unique taste that will lure those present back for seconds.

With the choice of these three gluten-free soups, dinner will be a smashing hit for those who indulge in it. The permeating smells that induce the salivary glands to be excited and the stomach to beg for food will leave everyone ecstatic for dinner. "Honey, I'm home," will now be a phrase that everyone excitedly recites as they enter the walls of their home knowing that a luscious meal waits.

Saturday, 28 September 2013

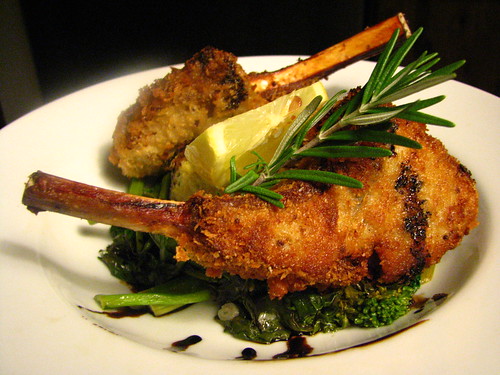
Lamb Chops and Deep Fried


Deep friend lamb chops are a yummy, fun way to add crunch to your family recipes or snack. And, needless to say, they are best when they are properly seasoned. Seasoning is one of the most basic steps of cooking any kind of dish. Although most other dishes incorporate seasoning as a part of the cooking process, in the case of lamb chops, it makes sense to pay a little attention to the best ways to season them for a deep fry.

Step one - choose your flavours. The crispness of your deep fried lamb chops and their outer coating, are qualities you can make use of when choosing a seasoning. Choose a strong, rich, or savory flavor to go with the crispness of the coating, and the essential sweetness of the lamb.

Step two - Begin seasoning with a light sprinkle of basic salt and pepper on both sides of the chops and let them rest for a while so that they absorb the flavors. Sea salt, or pink salt, combined with yellow pepper or a pepper blend can be interesting. Dust with some herbs at this stage to make the chops more savory.


Step three - Mix eggs and milk in a dish, and beat them together. You can add in some spices at this stage to add to the overall richness. Choices can range from rosemary, fennel, and thyme to garlic, or mint. Adding them to the egg mix will infuse the flavors into the lamb chop as it fries.

Step four - Take some bread crumbs, or flour in another dish. Consider enriching the flour with spices like curry powder, coriander, paprika, or tarragon. This is especially useful if you are not adding spices to the egg mix, or coating your chops with flour.

Step five - Dip the chops in the milk and egg mixture then coat them in the flour or the bread crumbs. Drop them in hot oil, and fry them until golden brown. Fry only about 4 at a time so that you ca prevent them from burning, and it is easy to turn them as needed.

Step six - Season the deep fried lamb chops, again, immediately after you take them out of the fryer to add a second layer of seasoning to your chops. The herbs or spices will not stick to the chops well if they cool. Sprinkle on your chosen herbs and spices, and pat them gently into the outer crust.

Tips for Re-heating

Brush some oil flavored with garlic or rosemary onto the lamb chops while re-heating. Once they have cooled after frying, they will lose some of their flavor, and it helps to enhance them at this stage.

Italian Potato Gnocchi


A classic Italian dish, potato gnocchi is one the best easy recipes that requires only a few ingredients including potatoes, egg yolk, flour, and Parmesan cheese. The gnocchi is dressed with pesto sauce made with fresh basil, garlic, and olive oil. His potato dumpling makes a fun snack, appetizer or side dish to Italian meals. This also makes a delicious substitute to the regular mashed potatoes and a healthier alternative to French fries.

You can make the pesto sauce ahead of time so that it develops in flavor as the ingredients meld together. To make the gnocchi, the potatoes are boiled, peeled, and then mashed and combined with whole eggs, flour, salt, and Parmesan. You can also flavor the gnocchi with nutmeg for a bit of spice. The ingredients should be well combined until you get a smooth and even consistency. Use a potato masher or a fork to get the desired consistency. You can also pass the boiled and peeled potatoes through a sieve to get any lumps out. Use the back of a spoon or a spatula to press out the mashed potatoes.


The potato mixture is rolled out and sliced into balls, dusted with a bit of flour and cooked in boiled salted water. While it sounds simple enough, making gnocchi requires technique so as not to ruin it. Done wrong, it might turn out soggy or rubbery. The timing is crucial when cooking the potatoes or they may end up crumbly. The potato dumpling should be delicately handled and shaped. Use a sharp knife to cut the rolls into soft pillows. Press the lines of the fork on the surface pillows with a light yet confident touch. Press down on the fork against the pillow with your thumb. The dumpling should form into a semi-C shape with ridges on the surface where the pesto sauce will stick.

Ingredients

1 1/3 lbs. potatoes (with skins intact)
1 egg yolk
2/3 cup flour
1.8 oz. Parmesan cheese
nutmeg
pistou (fresh basil, garlic, olive oil)

1. Pour olive oil in the blender and add the garlic first and then the pine nuts. Blend. Add the basil and then the Parmesan cheese. Pulse very quickly and place in a bowl then set aside.

2. Boil the potatoes in water with the skin still on until tender. Peel them after cooked and mash them with a fork in a large bowl. Add flour, whole eggs, some salt and Parmesan. Blend all the ingredients well until you get a smooth and even consistency.

3. With some flour, roll the dough in the shape of bread sticks. Using a fork, press the surface lightly to make ridges on the surface. Cook the dumplings in boiling water with nothing but salted water. Cook for just one minute. When the gnocchi floats to the surface this means they are done.

4. Drain gnocchi, arrange them on a plate and dress them with some pesto sauce.


A Great Eggplant Recipe


One of the best vegetarian recipes that is full of flavor. It is also quite beneficial for the health. Here the eggplant is cooked with mushrooms, bell peppers, onions and garlic and flavored with vinegar, chives, tomato sauce, red wine, oregano, salt and pepper to make a gourmet sauce. This is excellent for pasta shells or even rice. These vegetarian recipes can be included in your weekly family menu as it makes a light and healthy meal. This colorful and delightful dish is best enjoyed with a good glass of the perfect wine companion the red wine like Merlot of Pinot Noir.

In this healthy recipe, various flavors meld together to make an unforgettable tasting dish. The tanginess of the vinegar enhances the tomato sauce. The sweet peppers are the ones that balance the tart. To make your mouth water chives, onions, garlic and hot peppers give the dish just the right amount of spice. Mushrooms, on the other hand, give delicate and earthy flavor and a wonderful texture in the palate. It is the wine that gives a depth flavor and exquisite aroma. The wine also deepens the color of the red sauce and makes the dish look elegant. The eggplant, which is the star of this dish, turns silky, sour and sweet that makes this dish a memorable experience.


The eggplant turns sweet when cooked especially when combined with the peppers and the onions. When it comes to how the eggplant is cooked, some like their eggplant firm and with some texture. Others like it really cooked almost to the point of melting. In this recipe, the eggplant is cooked until soft so that it melts in the mouth. The pasta is cooked separately. It is then combined with the sauce later on. You can peel the skin of the eggplant to make it even silkier. But the skin contains substantial nutrition so it is also good to keep them on the eggplant. It is the skin that adds texture and body to the sauce.

Ingredients
2 cups pasta shells
1/3 cup water
1/4 cup vinegar
1 large sized, peeled and cubed eggplant
1 finely chopped onion
1/2 cup chopped mushrooms
1 chopped green bell pepper –
1/2 cup chives - chopped
2 tablespoon garlic - finely chopped/minced
1 each tomato - medium sized, chopped
4 tablespoon tomato sauce
4 tablespoon oregano
Salt to taste
Black pepper to taste
1/4 cup red wine

1. Cover pasta shells in water and cook in a saucepan according to package directions.

2. Add water and vinegar in a separate saucepan, and bring it to a simmer. Then add chopped eggplant, onion, chives, garlic, green peppers, and mushrooms. Cook for about 15-20 minutes until vegetables are tender.

3. Drain when vegetables are cooked then add to the cooked pasta along with tomato sauce, oregano, salt, pepper, and red wine. On low temperature stir and heat gently.

Wednesday, 25 September 2013

The Barbecue Season


Summer time can be a tough time to watch what we're eating. With all the bbq's, deliciouscocktails, parties, you name it, it's hard to watch what you're eating. Especially when you're a guest at someone else's house. Here's a few tips to take into consideration.

1. Ask your host/hostess what they are serving and how you can help, or what you can bring. They may tell you they are all set and you don't need to bring anything. Next, they rattle off the typical bbq list of hot dogs, hamburgers, ribs, macaroni salad potato salad, etc. Even if they tell you that you don't need to bring anything, at least bring a nice big, healthy salad mixed with lots of different veggies so get always prepare your saladrecipes. And even bring some turkey burgers. If they ask, politely say you appreciate the invitation and are looking forward to the fun day, but you're watching your health.

2. Instead of hamburgers, try making turkey burgers. But watch the label. Some ground turkey has more fat than hamburger.


3. Stick to boneless, skinless breasts of chicken. I love grilling it and then putting it on a nice, big salad. Keep food light, you don't want to be full and uncomfortable.

4. Skip the mayonnaise laden salads. Try expanding your menu and instead, include whole grains in your diet. I love making quinoa salad, or brown rice salad. Plus, think about how much everyone will enjoy the variety. We all know most bbqs offer the same fare, so mix it up.

5. Veggies, veggies, veggies. This time of year, they are abundant. Take advantage while you can. Instead of the heavy potato and pasta salads, why not make some grilled veggies? Or a nice cucumber salad. There's always the delicious tomato salad with fresh mozzarella, sliced red onions garlic, fresh basil with a little balsamic vinegar and a good olive oil. Keep it light.

6. As far as drinks? That can really kill the waist line. Here's a tip. Freeze some fresh fruit then put it in a blender, add a touch of Stevia or Xyletol and some water to get it the consistency you like. If you want to add alcohol, stick with the clears. And alternate one with alcohol, one without. Remember, it's very easy to get carried away in the sun and pool and you can easily become dehydrated. Always drink responsibly and never drink and drive.

7. Stay hydrated! If you're not much of a water drinker, try adding sliced fruit; lemons, limes, oranges. You can even freeze some fruit in ice cubes so it will flavor your water. I've never tried it but I know some of my friends like sliced cucumber or basil or mint in their water. Mix it up. If that gets boring, try making some sun tea. I love making the green tea and I add slices of lemons. Be daring, try one new thing every day. You'll never know what you like. Our taste buds change all the time. Live life.

Wishing you all a happy, healthy life. Let me know if you try any of my tips. And I'd love to hear some of your tips. Post them below. Thanks and have a great one.

P.S. A friend of mine made this and I just had to have the recipe. It's one of my favorites and it's definitely always a hit! Enjoy and let me know if you try it.

Brown Rice Salad
2 cups water 
1 cup brown rice 
1/4 cup diced red onion 
1/2 cup diced celery 
diced peppers... I use red, green and yellow, but up to you what color and how much (peppers were not actually in original recipe but I like them) 
1 cup dried cranberries 
1/2 cup balsamic vinaigrette salad dressing 
1 TBSP. sugar

In a saucepan, bring water to a boil. Stir in rice, cover, and reduce heat to low. Simmer for 45-60 min. or until done. Transfer rice to serving bowl and stir in all ingredients. Refrigerate and serve cold.

Tuesday, 24 September 2013

Making Dirty Eggs


Breakfast is the most important meal of the day! The first thing you need to do is get yourself some egg whites, bacon, sea salt, black pepper, a spatula and cheese (optional), a frying pan, and a measuring cup. I prefer white American cheese. I don't like the texture of the yellow American cheese. Get your frying pan and turn the stove on high to heat it up before you add the bacon. When the pan is hot, add four slices of bacon and reduce the heat so the bacon doesn't cook too fast. I usually flip the bacon every few seconds after it begins to cook so neither side has the chance to burn one of these awesome breakfast recipes.


When you have cooked the bacon, lay it aside and pour 3/4 of the bacon grease into a measuring cup. The remainder of the grease stays in the pan. Now add your egg whites. I usually pour about 1/4 of a carton into the pan. You can use your judgement about how much you want to add, but my suggestion is to add enough to make the eggs the star, so to speak.

Sprinkle some sea salt and black pepper over the egg whites. I actually think the sea salt slows the whites from cooking so fast. The egg whites will begin to cook quickly so you want to stir them until they turn to a solid, remove the frying pan from the stove top and continue to stir them. They will still cook even if they are not on the stove top. Stir until the whites are cooked to your satisfaction. Now you are ready to enjoy your bacon and egg whites, or as I call them, "dirty eggs." The bacon grease mixed with the egg whites makes them look dirty, so that's where I got the nickname.

Now you're wondering, "What about the cheese?" No worries! If you are adding cheese, place it in the center of the egg whites as they begin to cook and stir them into the whites. Continue to stir so the cheese is mixed in well with the egg whites. Remember to remove the egg whites from the stove top when they become solid and continue to stir until the whites are scrambled.

Healthy Food: Coconut Rice


For a flavorful and magical dish cook rice in coconut milk instead of water. Jasmine rice is cooked in cream of coconut and coconut milk and seasoned with sugar and salt in this recipe. The result is a sumptuous rice dish. It is perfect with curry dishes as well as fried fish or spicy seafood and meats. This makes a dinner or lunch extra special.

Jasmine rice is one of the most aromatic and flavorful rice available in the market. It is also known as Thai fragrant rice. It is a long-grain rice variety with a nutty aroma and a subtle flavor like pandan. Originally from Thailand, Jasmine rice is also known as Than Hom Mali and is available in both brown and white variety. For this healthy food recipe, it is best to use the white variety of Jasmine rice although for a healthier version you can still make this recipe with the brown rice.


Popular in Asian cooking, Jasmine rice and coconut milk is a very Oriental dish. It is best enjoyed with Asian fares, particularly Southeast Asian and Indian cuisine. This is also very delicious with spicy food since it is a bit sweet and can counter the hotness or spiciness of a dish. With steamed or sautéed vegetables for a light and healthy snack top a bowl of coconut milk flavored rice. Also making a delicious topping for this rice are stir-fried mushrooms and tofu. A simple stir-fry of ground meat, wither beef or chicken or a combination of both, in onions and garlic and seasoned with salt and pepper (or some cumin for and chili powder for spice) already makes an unforgettable meal topped over this rice recipe.

Find a good brand of Jasmine rice, preferably one that is from Thailand, when making this recipe. Before using, rinse the rice once until the water runs clear without milkiness. Before adding in with the other ingredients drain the rice well.


Ingredients
1 1/3 cups jasmine rice
2/5 cup cream of coconut
1 tablespoon sugar
1 teaspoon salt
1 cup coconut milk

1. Wash the rice by changing water several times in a large bowl. Set aside.

2. Boil the coconut cream in a saucepan. Once it boils add rice, sugar, salt, and coconut milk and allow it to boil again. Cover the pan and allow to simmer about 20-25 minutes, or until the rice is cooked. Stir often.

3. Remove from heat. Serve warm or hot with any curry.

Veggies and Rabitis


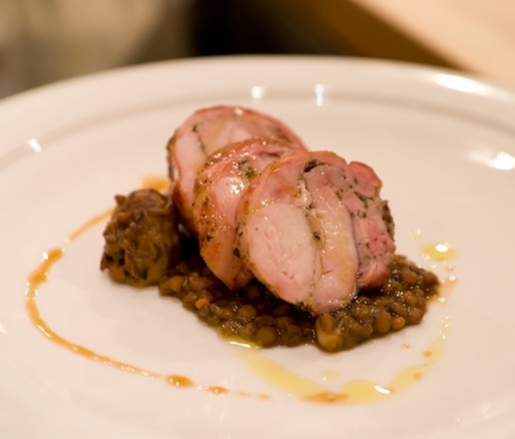
The mild and mostly white meat of rabbit is simply seasoned with salt and pepper and browned in butter in this gourmet recipe. The sautĂ©ed rabbits are covered in sumptuous gravy make with vegetables, rabbit meat, tomato concentrate, white wine, herbs, thick cream, and butter giving flavor to the dish and creating an extraordinarily unforgettable meal. The rabbit in a gravy sauce is served on a bed of lentils for a complete and satisfying healthy dinner ideas or lunch. Pair this with a good bottle of red wine such as Merlot, Pinot Noir or Shiraz. Bordeaux and Burgundy wines also go perfectly well with rabbit dishes.

Rabbit has very little fat and can quickly dry out and become tough. To avoid this, the rabbit meat should be cooked quickly on high heat sealing its juices and keeping it moist and tender. The creamy gravy used in this recipe also helps flavor the meat and give it additional moisture. For safety, cook the rabbit meat until it reaches an internal temperature of 160 degrees F. Do not poke or pierce the rabbit meat unnecessarily, however, since the little juices that it has will leak out and you end up with tough and dry meat.


When choosing rabbit for sautéing, choose a young rabbit, also known as a fryer, as opposed to a mature rabbit or a roaster. Young rabbit is more tender and moist than the older varieties, which are more appropriate for stewing or braising. Fryers have a fine grain and a bright pink flavor and can be cooked similarly to chicken. They are usually between 1 and 3 pounds in weight and are less than 12 weeks old. Roasters are generally over 8 months old and a little darker in color.

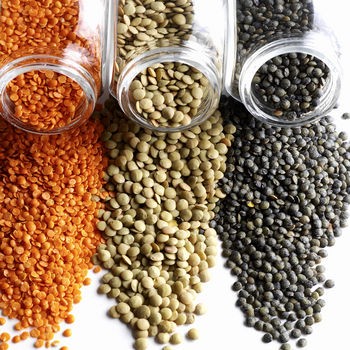
Don’t forget to soak the lentils overnight before cooking. The lentils will absorb the flavors from the gravy, vegetables and spices and make a perfect contrast and complement to the sautĂ©ed rabbit.


Ingredients
2/3 lb. green lentils
mixed greens (thyme, parsley, laurel)
3 rabbit fillets (about 2 2/3 lbs.)
5 large carrots
1 leek
1 tip of baking soda
2 shallots, butter
2 tablespoons cream
½ cup rabbit gravy

For the Rabbit gravy:
oil
1 lb. rabbit carcass - rabbit pieces (front, head) cut into small pieces
1 diced onion
sliced carrot
1 crushed garlic clove
1 tablespoon tomato concentrate
1 1/4 cups white wine
1 1/4 cups water
salt, pepper

1. Start preparing the rabbit gravy by heating oil in a large Dutch oven or similar an. Brown the rabbit pieces. Add the vegetables, allowing them to brown, stirring constantly. Add water, tomato concentrate, and white wine. Simer for 30 minutes. Allow to cool. Strain in a fine sieve. You should obtain about 1 1/4 cups gravy, which you can refrigerate for about 1 week or place in the freezer.

2. The night before preparing the meal, soak the lentils in lukewarm water. Cook the lentils in salted water with the mixed greens for about 30 minutes. Drain and set aside.

3. Prepare the rabbit fillets and cut each into 5 or 6 large cubes. Wrap in foil and refrigerate. Peel the carrots and dice one of them. Cut the other carrots into small balls, using a special knife. Cook in boiling, salted water. Keep only the white part from the leek. Cut it a la julienne (into long, thin strips) and cook in boiling, salted water with a pinch of baking soda. Refresh in ice cold water and drain. Mince the shallots and place them in an airtight container in the refrigerator.

4. Heat a small amount of butter and the minced shallots in a saucepan. Allow shallots sweat for a moment. Add the diced carrot, lentils, 2 spoons cream, 2 spoons rabbit gravy, and 1 oz. butter. Allow to gently simmer until the whole is smoothly bound. Season.

5. Season the rabbit pieces with salt and pepper. Place them in a pan with 1 ½ tablespoons butter. Sautee on low heat for 6 to 8 minutes (without browning), stirring regularly. Simultaneously, sautĂ© the carrot balls in butter. Season. SautĂ© the leek a la julienne in some butter. Season. Boil the rabbit gravy for 1 minute. Bind on high heat by incorporating 3 tablespoons butter. Season.

6. Place the lentils in the middle of preheated serving dishes. Lay the rabbit pieces on top of them and sprinkle with the leek and carrot balls. Pour a spoon of gravy over each side.

Sunday, 22 September 2013

Halibut In Creamy Wine Sauce


One of the most delectable and versatile fish to cook is halibut because of its firm, mild and white flesh. To make a simple yet delightful gourmet meal, halibut is cooked in the crock pot with a luscious and creamy white wine sauce in this recipe. Halibut is a large flat fish. Its range in sizes depends on its age and kind. The California halibut is relatively smaller. While the Pacific halibut is gigantic in size and can grow up to more than 500 pounds. Most of the time, halibut is sold as steaks in markets and groceries and don't forget about the perfect paired wine for this recipe.

Halibut is very healthy. It can be included in the weekly diet because it is sustainable, especially the Pacific halibut. Most of the halibuts sold in the market are Pacific, specifically Alaskan fishery. California halibut is available in California and usually caught between 4 and 12 pounds. But these kinds of halibut are sold as fillet since they are relatively small in size. Both kinds of halibuts are similar in taste and texture. Halibut can be sold fresh or frozen. This kind of fish stores very well as long as it is vacuum-sealed. It can retain its quality for a year.

In this recipe, the halibut is cooked in the slow cooker or crock pot. It contains very little oil because it is a lean fish. It can dry out pretty fast when cooked improperly or too long. While it is cooking, the white wine sauce is added to the dry halibut steaks. It also provides moisture and flavor, allowing the meat to absorb the flavors well. There is no need to marinade the halibut like many recipes require. In the process of slow cooking, the flavors the fish will penetrate deep into the flesh and make a really tasty dish. Also enhancing the moisture and flavor of the fish is the lemon added at the end.

Ingredients
250gms packages halibut - steaks, thawed
2 tablespoons flour, all-purpose
1 tablespoon white sugar
Salt to taste
100gms butter
1/3 cup white wine - dry
2/3 cup milk - or half and half
1 lemon cut into 4

1. Dry the halibut steaks. Then put them in Crock-Pot.

2. Mix the flour, sugar and salt in a separate bowl. Set aside.

3. Melt butter in a pan and add the above flour mixture. Keep stirring. When it combines well, add wine and milk. Cook over medium heat until thick consistency is reached while stirring constantly.

4. Let it boil for a couple of minutes. Pour this sauce on the dry halibut steaks. Cover. Cook on High flame for about 20 minutes.

5. Once cooked transfer halibut to serving plate. Garnish with chopped lemons.

Saturday, 21 September 2013

Salad Greens at the Table


Nothing is more delectable then a vessel full of crisp, delicate grains, cheddar and sweet tree grown foods. Presently greens are flavorsome and bright. Distinctive shade tree grown foods make mixed greens look incredible and mouth-watering. You unquestionably feel delight by designing your dining table with greens of distinctive shades and taste. Mixed greens are ideal for all occasions. It might be make for a light lunch. You can make soil grown foods mixed greens for children that is a sound eating methodology for them. Different shade soil grown foods cutting in exceptional shapes will lure children to consume this mouth-watering dish. Today all empower consuming more leafy foods, greens is ideal for intending to consume them. You can include easy pasta recipes, chicken recipes, noodles and fish and so forth to make greens of eminent taste.

There are different types Of Salads:
Vegetables greens generally use with dressing of China. Some utilize them as an eating methodology dish full of filaments and vitamins. Cabbage, cucumber, lettuce with tomatoes mixture is exceptional with utilizing lentils. We can say mixed greens are flawless achievement of China. It is solid dish for a supper.


Mixed in Season
Greens are of distinctive shapes and tastes. Greens might be ready consistent with each person preferring in each time of year. Potatoes and eggs with mayonnaise are best for the persons who like egg to consume. Chicken might be added to mixed greens to make a flavorful taste for non-vegans. Fish likewise could be included place of chicken for an one of a kind taste. Mayonnaise potato greens are tempting nourishment for children. In this age pattern of pasta mixed greens is expanding. Delectable taste of pasta chicken mixed is a dish for lunch. Chickpea, ringer pepper and beans greens are extremely immaculate in summer.

Consume well to leave well so greens full of strands and vitamins are best decision for a light lunch. It could be make modest or complex all relies on your inclination. Foods grown from the ground mixed greens could be utilized as a treat and could be fit to your dish arrangement. Delectable chicken pasta greens could be served in a supper gathering.

Salad Designing
Decorating of mixed with diverse outline pull in individuals to consume it. Enhance the greens is generally essential to others in light of the fact that assuming that one thing look exceptional to eye it tease our taste bud before consuming it.

Bubble vegetable greens are invigorating for an eating regimen arrange. All individuals don't prefer vegetable greens they adore meat so chicken mayonnaise greens are best elective for them to dress their eating table with them.

Salads with Colors
Greens are dependably straightforward to make. Shade, taste and texture everything is paramount in making greens. Crisp vegetables and soil grown foods are ready all around to make mixed greens to finish your eating table.


Delicious Dessert for Poornalu


The Poornalu also known as the Sugiyan or Boorelu is a delicious Indian dish. Although it is usually prepared differently in different parts depending on traditions this dish never fails to wow most people with its exquisite taste and rich flavors. Primarily made from the popular Chana dal and regular rice these kind of simple recipes is a blend of fascinating flavors and aromas that has seen it gain increasing popularity even outside India in recent times. To make this intriguing dish at home you can follow a list of easy steps and instructions expounded in the simple recipe below without any trouble.


Ingredients
1 2/3 cups rice flour
1/2 cup black gram or Urad dal
Pinch of salt
1 1/4 cups Bengal gram or Channa Dal
3/4 cup grated jaggery (granulated sugar can be substituted)
1 1/4 cups fresh grated coconut
1 teaspoon cardamom powder

1) Soak rice and the Urad Dal overnight or for at least 8 hours. 

2) Grind the mixture into a uniform fine batter, add a pinch of salt to it and set it aside to ferment further. 

3) Put Channa Dal in a pan and cover it with water. Then Put the pan on a medium hot flame, bring the water to boil and let the Bengal gram cook until tender. 

4) Remove from fire and strain it to drain excess water then mash it and grind it into a smooth uniform paste. 

5) In a different bowl mix jaggery, grated coconut and cardamom powder evenly. 

6) Add the mixture into the Channa dal paste and return to fire to cook into a smooth paste while stirring constantly. 

7) When ready remove from the fire and make small balls with the paste. Set them aside. 

8) Dip the Bengal gram balls into the rice and urad dal paste. 

9) Heat some oil in a pan over medium heat and fry the balls until they are golden brown. 

10) Serve while hot or warm with tea or coffee.

Making Your Favorite Tomato Salad


What do you get when you mix together mayonnaise, crushed garlic, and tomatoes? You get a tasty salad meal that is cheap to make and fills you up on taste. Not too mention, by making home-made mayonnaise, you'll avoid the dangers associated with processed foods.

This quick to make recipe will take no longer than 30 minutes to prepare, and with the listed ingredients, you'll be able to serve up to four people. My favorite ingredient for these kinds of simple dinner recipes is garlic. I am a garlic lover by nature, the more garlic a recipe requires, the happier I am! Take two medium sized cloves of garlic and crush them, and dump the crushed garlic into a small bowl. Ideally, you should have a timer, and you should set that timer to ten minutes. When the ten minutes are up, that's when it's ideal to eat your garlic raw or add it to your dish. In another bowl, add the minced chives and the teaspoon of sweet basil. Dice up the celery next, and to the chives and basil.

Fresh mayonnaise will take some work. If your arm isn't up to whisking for several long minutes, you might want to take the shortcut and just buy mayonnaise from your grocery store. For those that want fresh mayonnaise, do proceed! Fresh mayonnaise is not hard to make, but it takes a little finesse, and a lot of patience. First, drop a single egg yolk into a bowl. Add a half teaspoon of salt and a half teaspoon of dry mustard. Now whisk!


While you're whisking, add a single drop of the peanut oil, and then add another drop. Keep whisking! And keep adding the oil one drop at a time. As long as you don't rush this process, you'll make delicious, fresh mayonnaise. Keep whisking, and keep adding the oil until the full cup of peanut oil has been added to the mix.

When the mixture begins to thicken, that is the point when you can add the oil at a faster rate. Be warned! If you try to add the oil too quickly, you'll ruin the process and you'll have to start over. So, be patient. Add the oil slowly, and don't stop whisking. Your arm will certainly be tired by the time the mayo is ready to eat, but once you taste it, you'll become a fresh mayonnaise addict and won't settle for store bought mayonnaise ever again. On a side note, a couple of drops of lemon juice can be added when you first start whisking to help stabilize the process.

Now you'll need four jumbo tomatoes. Wash and rinse them, and then slice them in half. Drain the juice, but scoop out the pulp and seeds and put into another bowl.
By now your 10 minute garlic timer should be complete. Add the crushed garlic, minced chives, diced celery, and basil to the bowl of tomato pulp and seeds. Mix together, and then add as much fresh mayonnaise as you like. Salt and pepper it to your preferred taste.

Now, fill up the four tomato halves with the dressing, and then place them into the refrigerator. You'll want to chill them for at least thirty to forty-five minutes before eating. If you have any left over mayonnaise, place it inside a plastic container and keep it in the refrigerator for later use. Fresh mayonnaise will only last a few days, so use it sooner rather than later.

While the above recipe creates a great tasting dish, you can also add fried bacon, parsley, almond slivers, and even cayenne pepper.

Fresh Mayonnaise
1 egg yolk
1/2 teaspoon of salt (sea salt is okay to use)
1/2 teaspoon dry mustard
1 cup peanut oil
1 teaspoon lemon juice

Tomato dressing
2 cloves garlic (crushed)
1 cup diced celery
2 tablespoons of minced chives
1 teaspoon basil (minced)

You'll also need:
4 jumbo tomatoes

Friday, 20 September 2013

The Ciabatta Salad


ciabatta salad, oh so simple and really delicious,mouth watering tastes, your acquaintances will probably be coming back for much more! Ciabatta salad is an excellent carbohydrate to serve, specially for hungry acquaintances and family. It so versatile and you will find so many methods in which to serve this salad. It may be served with numerous variations, the selections are endless and it truly is yours completely to create. It's going to definitely fill the hunger gap of any visitor and go down an absolute treat. Passionate about preparing food is a marvellous attribute to bestow on your loved ones and pals. I would advise the ciabatta salad to nice the soul.

Entertaining your close friends and family certainly is one of the finest things to celebrate in life, the options are endless, you can find so many of us now who favor the vegetarian alternative. A coleslaw salad is a single of those food recipes, using the right garnishing and fine refreshing ingredients. You may most definitely taste this inside your dish. An egg salad is some thing most of the people take pleasure in, especially young young children, so healthy and yummy for all to get pleasure from. You can find wonderful health benefits to consuming eggs in men and women of all age. One particular egg contains six grams of high quality protein and all 9 essential amino acids. Now that's a purpose alone to have an egg a day.

Tuna salad should be my most preferred salad ever! It truly is some thing we must all have in our cupboards, so versatile to whip up tuna salad, whatever ingredients you might demand can easily be made up with minimum time and effort. Tuna is filled with vitamins and nutrients low in saturated fat and is an excellent source of protein. Bean salad is one more excellent salad for all those vegetarian close friends and family. Be ready to wow your guests, having a easy bean salad, with the right seasoning along with a quick toss, you are going to be an absolute winner! With vegetarians, beans are always a winner due to the versatile options we've.

Spinach salad is really a wonderfully crunchy salad, packed with iron, absolutely everyone must be adding this to their family members gatherings and thanksgiving dinners. Rice salad is wonderful to serve because it has a lot of well being benefits, fantastic carbohydrate for dinner, particularly if any individual is needing that added enhance of power I'd recommend a rice salad as when once again, it is so versatile and you'll be able to possibly look in your cupboard to add ingredients you could need to have. Moving on to that wonderful green pear shape we contact the avocado pear, it is also referred to as the alligator pear as a result of the shape. Nicely, this tiny a single is complete of fibre, potassium and vitamins c & k. The avocado also contains folic acid, which is excellent for expectant mothers. It's a tasty side to any dish and deserves to be enjoyed by everybody. Staying with one thing green, we talk peas, as in a nutritious pea salad. They enhance your power without the sudden drop that other forms of sugar produce. Peas taste so good, so yum in fact, kids will know they are eating one thing nutritious. Pea salad is most suitable for a snack or a leftover for children's lunch boxes.

When it comes to preparing salad for my family members, I take numerous factors into consideration, making sure ingredients are fresh, using the best ingredients wherever possible, but with all salads, that absolute finishing touch of adding or finishing off with making the most wonderful tasty fresh dressing. When completing your coleslaw do not forget to add your secret ingredient which has to be your dressing, a sure winner it's going to be . The cabbage dressing is equally important making sure you have when once more followed through with all the instructions, adding them to your fine dish, what a treat!

The Original Carpaccio Cipriani


While raw beef salad served as an appetizer has long been a part of the Italian cuisine, its name made headlines sometime in the 1950s. The Carpaccio Cipriani was a recipe of Giuseppe Cipriani, the man who named it after the Venetian painter Vittore Carpaccio. The appetizer was a signature dish served at Harry’s Bar in Venice owned by Mr. Cipriani. Now his son, Arrigo Cipriani, himself a chef, has taken on the Cipriani family tradition and demonstrates their recipe.

Get the best quality beef you can find since it’s the core of the dish. For easier handling, the chef suggests freezing the meat first in the freezer for an hour or so until it firms up. Doing so speeds up the slicing since the delicious meat is firm already. The meat is sliced paper thin, as if it was prosciutto, so that its drapes and folds look more attractive on the plate. It also helps in the eating of this raw appetizer.

To douse on top of the beef slices, a combination of creamy mayonnaise is spiced up with mustard and Worcestershire. It’s a perfect mix of creamy, tangy and spicy which complements the beef. The chef uses homemade mayonnaise for a creamier and richer sauce which is incomparable with the commercial variety.

Make your own mayonnaise by combining in a blender or food processor the following: egg, lemon juice and mustard. Blend until smooth. Then over low speed, stream the olive oil until the mixture emulsifies and thickens. Season with some salt and pepper. Mix with the other ingredients in the carpaccio sauce as usual.

To serve, mix the carpaccio with a plate of mesclun greens, most notable the spicy and refreshing arugula with olive oil dressing. The nutty and bitter flavor of the arugula balances the raw meatiness of the cold beef. Serve this appetizer chilled and pair with a glass of Chianti rouge.


Ingredients
3/4 lbs. beef fillet
3.5 oz. mayonnaise
1 teaspoon mustard
1 teaspoon Worcestershire sauce
1/3 cup milk
1/2 lb. arugula or mesclun (chervil, arugula, leafy lettuces, and endive in equal proportions) salad
cold-pressed olive oil
1 celery branch
1.8 oz. parmesan cheese

1. Slice the raw beef filets very thinly. Arrange on a plate forming a concentric circle. Chill in the fridge.

2. Prepare the dressing. In a bowl, mix the mayonnaise, mustard, and milk until creamy in consistency. Season with the Worcestershire sauce, salt and pepper.

3. Bring out the chilled beef slices then drizzle with a generous amount of the freshly mixed sauce.

4. To serve, arrange a bed of mesclun greens, including arugula. Sprinkle with thin slices of celery and shavings of parmesan. Drizzle with extra virgin olive oil and the carpaccio sauce. Serve with the carpaccio.

Wednesday, 18 September 2013

Making the Perfect BBQ Ribs


Selecting the Ribs:
There are two basic cuts of ribs: baby back ribs and loin (spare) ribs. The baby back ribs are, as the name implies, close to the backbone, and the spare ribs are closer to the stomach area. The baby back ribs are a bit leaner and have a milder flavor, but spare ribs get my vote as being even tastier, and with a lower price tag. St. Louis style ribs are trimmed spare ribs removing the extra flap and the small end with no rib bones. These days, the big superstores all carry vacuum sealed rib cuts that are ready to cook. Always purchase ribs with no water or solutions added! To further help you out check out some salad recipes to accompany your delicious ribs.

Preparing for the Fire:
Before you cook the ribs, flip them bone side up and with a sharp knife, score the membrane between each rib section. This will make them easy to separate after cooking. For extra tender ribs, remove the entire membrane. Competition cooks never skip this step, but it really is an optional step, unless you are trying to win a competition.

Be sure and spice up your ribs with a good BBQ rub. You can do this with a commercial BBQ rub or make your own secret recipe. The rub gives your ribs a distinctive flavor, so don't expect to get Bubba's prize-winning BBQ rib rub recipe. The rub will give your ribs their spice and signature flavor, so experiment with a few different kinds. Take a store-bought rub and add a secret ingredient to create your own BBQ rub. The important part is the eating of the ribs, but the secrets kept between cooks are a big part of the fun of BBQ cooking!

Cooking Slow:
Place the ribs bone side down on a preheated smoker. The fire will need to be somewhere between 200 to 250 degrees. This is important so watch the heat to keep the cooking temp right around 225 degrees if possible. You will have to learn the characteristics of your smoker, since the temperature gauge is not really measuring the temperature right at grill level. Even the outside temperature will affect the cooking time. There is some margin for the heat range, but keep the temperature inside the smoker as close to 225 degrees as you can.

Add some wood for smoking to the fire. Not too much, since you don't need extra heat; just enough smoke to polish the flavor of the meat. My preference is hickory since it is naturally spicy and adds to the spicy flavor from the rub, but any good hardwood will work well. The smoke from the wood chips during cooking should be steady, but only enough smoke to add flavor.

Check the ribs once or twice during cooking, but avoid too much peeking, since the heat will escape every time you lift the lid. Use indirect heat on one side of the grill and use foil as a buffer between the rib racks and the fire. A side fire-box helps to control heat and smoke without disturbing the main cooking area.

Once the ribs are cooked, they will pull back at the ends of the ribs. The time spent cooking is going to vary but around 3 to 4 hours is pretty typical for ribs. Don't cook too fast, but by all means keep cooking if they are not perfect and tender. If it takes 6 hours, the results are all that counts. Cook the ribs "dry" and add sauce, if you want sauce, 20 minutes before taking off the grill. The sauce will be slightly cooked but not blackened or burnt. Enjoy those ribs!

Tuesday, 17 September 2013

Using Pork Feet and Cheeks


The skilled home cook knows how not to put any part of the pig to waste, even the most often ignored ones like the pig's feet and cheeks. They are considered carcasses that end up in the waste bin or are used only to make stock. Very few know that pork feet and cheeks are used in delicious cooking recipes. When deep fried the pork feet and cheek becomes tasty and crunchy parts worth the effort in preparing them. In this recipe, learn how to make a gourmet meal out of the unwanted parts of pork meat.

Pork feet and cheeks take on a flavor that is distinct from the white parts of the meat. When deboned and ground, you will discover that they have so much texture and packed with intense and distinct flavor that is too good to be ignored. In this recipe, the pork is stuffed with veal cooked with egg and cream. The pork is then rolled with the stuffing inside then poached in a bouillon. Aromatic sauce made of cepes mushrooms, veal drippings, and some herbs and spices are used for seasoning to further enhance the distinct taste pork feet and cheeks meat. Lightly buttered cepes mushroom caps are served together with this special dish. The result is a beautiful, elegant and unique dish that will titillate your taste buds. This special dish is best paired with a bottle of Mordon wine.

Don’t throw the bones of the pork or leave the bones at your butcher’s. You will need pork bones in this recipe. It will be used to make a rich and flavorful sauce. With the addition of veal drippings, the sauce takes on a whole new dimension of complexity. The thyme and bay leaf balances out the flavors of the meat while the mushrooms give it an earthy and heartwarming element. Around a hundred and fifty grams of veal, fifty grams of fresh cream, and one egg are needed for the stuffing.


Ingredients
2.21 lbs. pork cheek
2.21 lbs. cooked pork feet
2.21 lbs. cepe mushrooms (select only large mushrooms with a head-diameter of at least 2 inches)
2 tablespoons butter
1.4 oz carrots
1.4 oz. turnip
1 oz. celery
0.35 oz. leek, pepper
For the marinade:
2.8 oz. garlic
thyme
1 rosemary branch
5/8 teaspoon Guérande sea salt
6 tablespoons raisin core oil
3 soup spoons olive oil from Nyons

1. In a saucepan, melt some butter. SautĂ© the veal. Add lightly sweated chopped onions. In a blender, crack the eggs and add fresh cream. Add chopped onions and veal. Mix the ingredients very well to get a very fine stuffing.

2. Debone the pork. Spread and open it wide. Place the stuffing inside the pork. Wrap the pork with a thin film, and roll it extremely tight. Poach in a bouillon. Slice it into four pieces.

3. Separate the caps from the stems of the cepes. Set aside. Fry the mushroom stems in some shallots and oil and then add the pork bones. Add thyme and bay leaf. Pour red wine to deglaze. Add veal juice. Cook until reduced. Pass through a sieve to get sauce.

4. Lightly fry the caps of the mushrooms in some butter and cook with some of the sauce.

5. Place the poached pork pieces on a serving plate. Top with the mushroom caps. Pour some sauce on top. Drizzle some parsley oil on the sides to finish.